Friday, March 11, 2016

Baked With Love jar recipe gift tags & Thank You card

This Christmas, my husband bought me the Tangerine KitchenAid mixer from our wedding registry! (!!!!!!) This, of COURSE, required me to immediately buy the Baked With Love set from Lawn Fawn. :) I immediately went to work baking some delicious treats, and then found reasons to use the stamp set, first for his thank you card, and then translating this same card idea into a gift tag/recipe card for a few jar gifts we gave in January!

For Phillip's Thank You card, I mimicked a card I'd seen through the Lawn Fawn blog, where the creator used the fantastic Gingham Backdrops set to create a tablecloth, and then mounting the die-cut and watercolored (using watercolor pencils) Baked with Love images. The card (along with tablecloth) was first die-cut into a circle shape. I die-cut a second circle and scored it about 3/4 inch down from the top, then adhered the two circles together (just above this fold) to create the folded card.

Phillip and I had made mason jar cookie mixes to take to two friends (one for a birthday, another as a host gift), so I replicated the circle design as a gift tag, writing the recipe on the back. For these tags, I replaced the other Baked With Love images with cookies instead that were made by die-cutting tiny circles with the lawn cuts from Owen's ABCs out of Paper Bag paper that had been pre-dotted with 'sprinkles', and then edging them in espresso pigment ink. I then cut a bite out of one card for each tag, and adhered all the pieces together. I made sure to match the kitchen aid color to the recipients' mixers, of course. :)


SUPER EASY and fun gift idea - and delicious recipe, too! We also kept one mix of the cookie ingredients for ourselves, and thoroughly enjoyed them after delivering the treats to our friends!


Happy 7th Birthday to my Nephew!

My nephew turns 7 this weekend, so I had to put together a birthday card, and felt like this was a great opportunity to try out the black & white with a splash of color technique for the 125th Lawnscaping Challenge!

For this card, I used stars from the Blue Skies, party hats from the Hats Off to You, and the small cupcake from Birthday Tags to create the fun B&W patterned background. I then used the photo frame die from #awesome to cut out three frames from an old Paper Source calendar, and stamped and die-cut a fourth frame on white for the top layer. I figured out my placement then set these frames aside so I could color in the background that was framed with watercolor pencils. I also die-cut and colored in the larger cupcake from the Baked With Love set (also using watercolor pencils). The frames were added on with your standard tape runner, shifting them so they created the fun color splash, and the sentiment (also from #awesome) was heat embossed in white on black, and the strip added to the card with tape runner as well. Finally, the cupcake was adhered with a foam square to make it pop.


This card is being entered in to the Lawnscaping Challenge #125: Color Splash.

Wednesday, February 10, 2016

Lawnscaping Challenge #123:ending Love (Entry 2)

The current Lawnscaping Challenge is on one of my favorite topics! Being from Loveland, Colorado, I absolutely LOVE Valentine's Day and all things love!

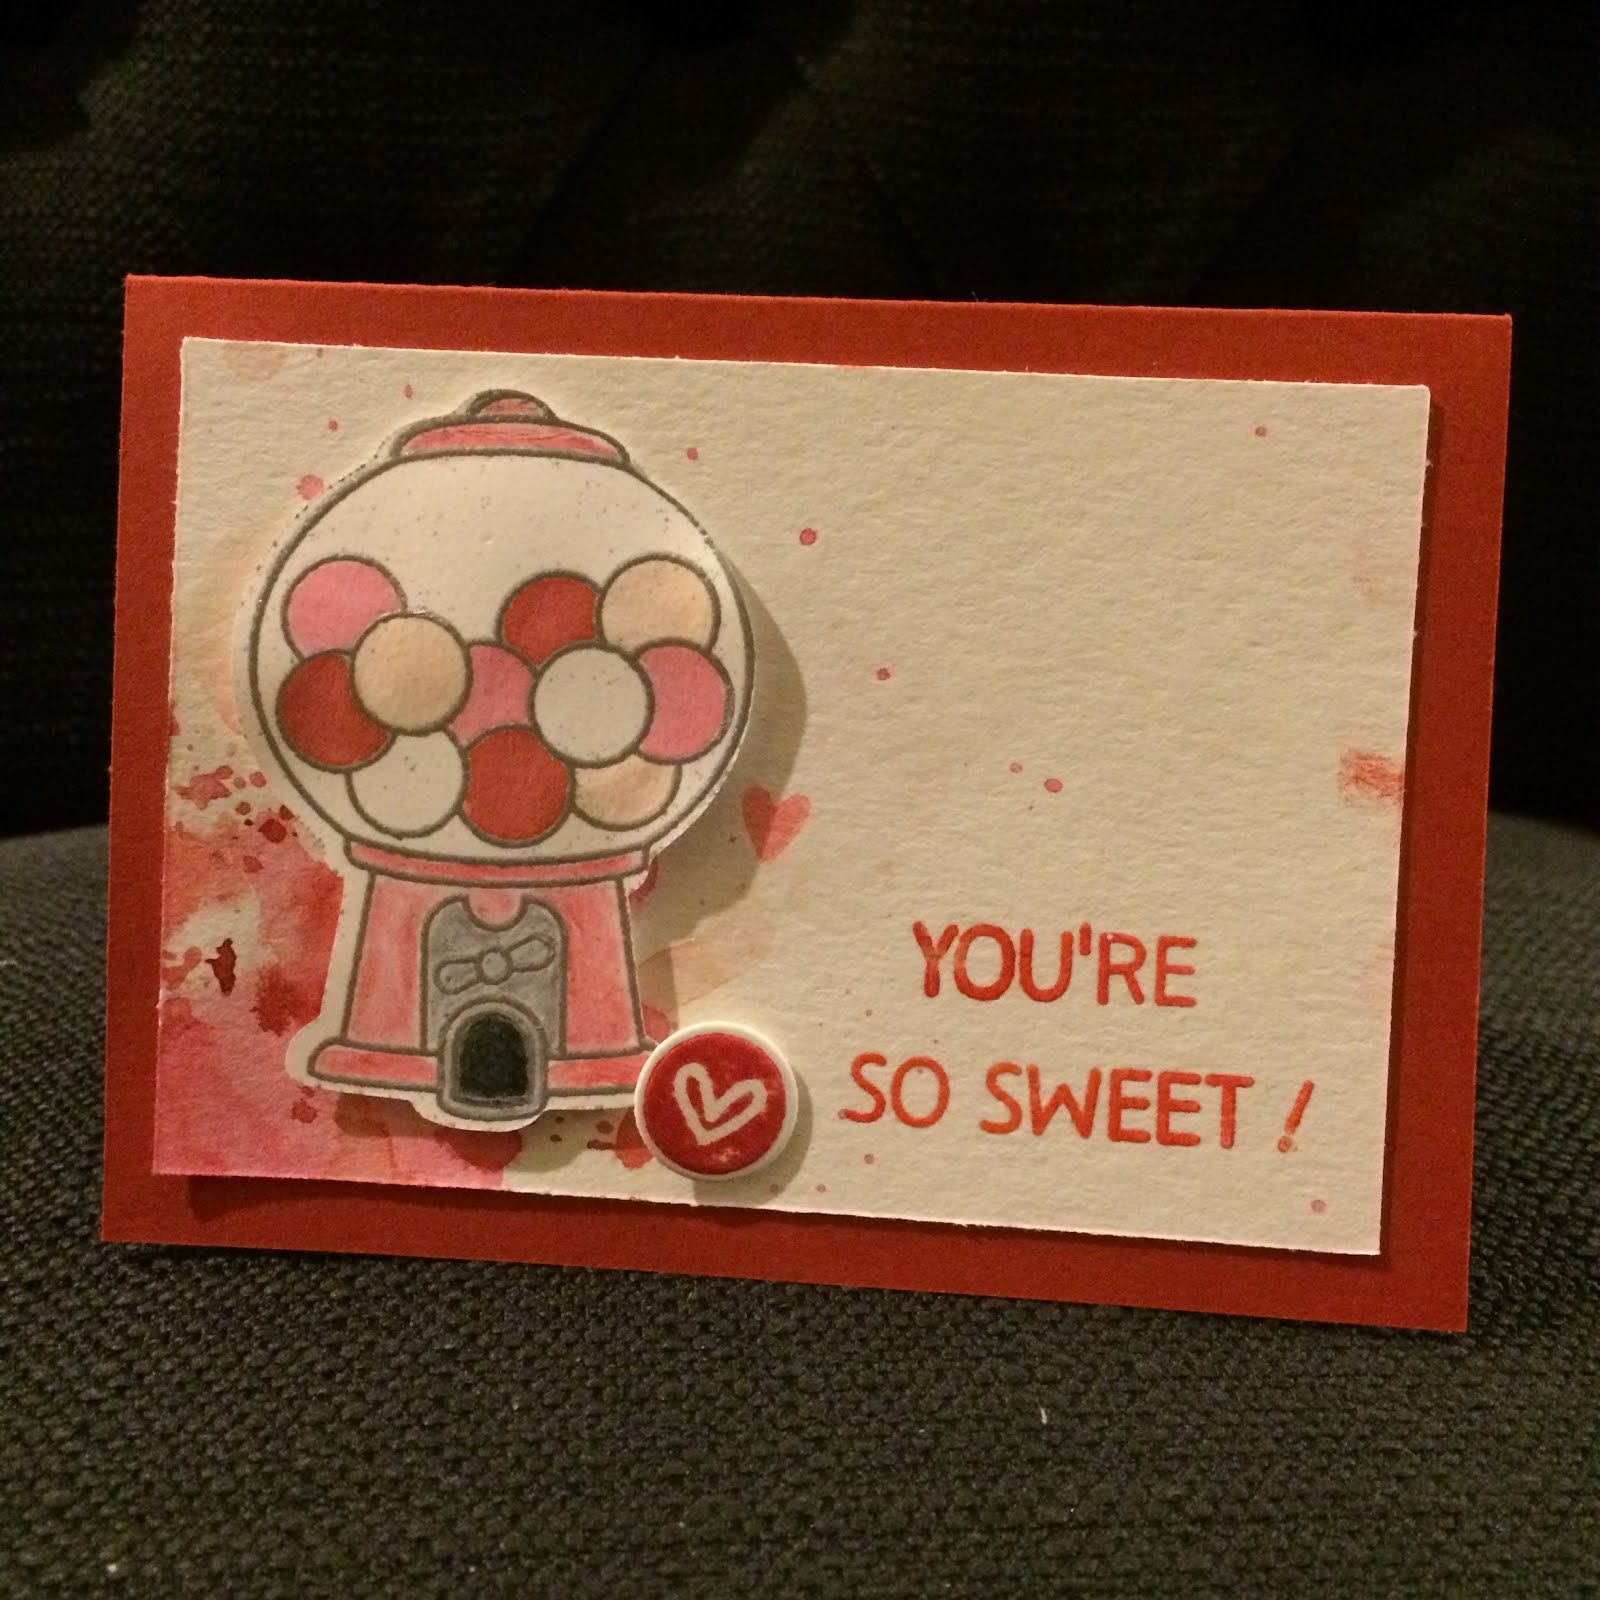
I sent out two sets of Valentine's this year, my second set using the Sweet Smiles stamp set from Lawn Fawn, and using additional hearts from Love You a Latte and Baked With Love.

I used distress inks to add the watercolor 'splash' effect, and used watercolor pencils and distress inks to color in the gumball machine and gumballs. I also stamped and die-cut the round hearts using the Owen's ABCs set - my current FAVORITE alphabet set in my stash! I also stamped a variety of the hearts from the different sets on the background using a coral-pink pigment ink, and I embossed the sentiment with clear embossing powder. I added the die-cut images with foam squares and adhered the panel to a Paper Source persimmon 4 Bar card.

Here are my two favorite of the sweet smiles Valentines, and I loved how each turned out different based on the watercolor splashes!


Enjoy! <3

Lawnscaping Challenge #123: Sending Love (Entry 1)

02/18/16 Update: My card was selected as an Honorable Gnome for the Lawnscaping Challenge! :)


Original Post:
The current Lawnscaping Challenge is on one of my favorite topics! Being from Loveland, Colorado, I absolutely LOVE Valentine's Day and all things love!

I sent out two sets of Valentine's this year, the first using the Treat Yourself stamp set from Lawn Fawn, and using additional hearts from Love You a Latte and Baked With Love.

I used distress inks to add the watercolor 'splash' effect and to color in the heat-embossed ice cream stamps. I also stamped a variety of the hearts from the different sets on the background using a coral-pink pigment ink, and I embossed the sentiment with clear embossing powder. I rounded opposite corners before mounting the panel to the Paper Source mint card (which is my favorite use of a corner rounder!), and added the die-cut images with foam squares.

This was my favorite, but I made a handful of these in a variety of colors.


Enjoy! <3

Saturday, October 3, 2015

World Cardmaking Day! Watercolor Stationary

Happy World Cardmaking Day, y'all!
My friend will be interviewing for medical school soon, so I decided to make her some custom thank you cards for her birthday! I used superfine white A2 cards from Paper Source, and masked off a rectangle using masking tape. I then used Ranger Distress Inks and water to create my watercolors, and painted them on with a wide paintbrush. I made two of each design above, in part because I'd masked two cards side-by-side so it was easy to duplicate the watercolor patterns. I briefly heatset these, then let them completely dry and watched a movie. :)
Afterward, I heat-embossed the Thank You Scripted image (stamp from Paper Source) with Superfine Detail Gold embossing powder, and the cards were complete! My fiance cut and installed the envelope liners from the Mint Floral wrap by Rifle Paper Company. I created a quick A2 card box (following the directions from a video posted to the Lawn Fawn blog), and we had our completed gift set!
What are you making today?

Friday, October 2, 2015

Fall Leaves Pop-Up Thank You Cards

So at my side hustle at Paper Source Austin, I have the fantastic opportunity to teach crafting workshops, thus learning fun crafting techniques in the process. This pairs my passion of art and creativity with my passion for teaching and learning - thus, the perfect side gig for me! :)

At our recent Fall Cards Workshop, we created some beautiful and fun pop-up cards using the our pre-cut Small Paper Leaves packs. One card featured a pennant-style banner that read "FALL" with some leaves hanging from either end. The other had three of the maple leaves attached together and popping up when the card is opened.  I loved both so much, and wanted to use the maple leaf idea in some 4-bar Wedding Shower thank you cards.
I started by masking a border on the front of the cards with masking tape, then using distress inks with water to create my 'watercolor' effect, simply painting them on with a wide brush. I did all three cards simultaneously and had them side-by-side, which made it easy to drag the ink across the cards and masking tape between them, which allowed me to have very similar finishes. The brush I was using had firm bristles, which created a fun bit of splattering on the cards as the bristles brushed over the masking tape, so that added more fun dimension. I heat set these briefly, then let them completely air drive overnight before embossing the beautiful scripted Thank You Handwritten rubber stamp with versamark ink and Gold Superfine Detail Embossing Powder.
A

While the ink was drying, I cut leaves using my Silhouette Cameo from Persimmon, Curry, and Papaya coverstock papers (although I'd recommend using text-weight papers instead - I just didn't have any handy!). You don't have to have a Cameo for this project, since Paper Source sells the pre-cut leaf packs in-store (which are text weight! Yay!)! I took one of each color, and determined the order in which I wanted the leaves on the inside of the card (in this case, I alternated the order so that each card had a different order). Then, I took the middle leaf and used a ruler and bone folder to create a score line down the middle of the leaf. I then took the leaf that would show on the left side of the card, and made one score line that extended diagonally on the RIGHT side of the leaf from one ridge of the leaf to the stem of the leaf, and another parallel to this one about a quarter inch beside it. I repeated this with the right leaf and mirrored the score lines so they'd be on the LEFT side of the leaf.

Once you crease these score lines, you end up with a leaf that kind of curls up over onto itself. I adhered the smaller portion of this leaf curling up over onto itself to the back of the middle leaf (they should match up perfectly), and did the same with the other side, so that all three were attached together. The end result is a grouping of three leaves glued together. I took this grouping and placed six foam squares (three on each of the outer leaves), as shown in the picture, without removing the covers so the adhesive wasn't yet exposed. To install, I opened the card and lined up the score line on the middle leaf with the card's fold, then removed the three foam square covers for the leaf that would be on the RIGHT side of the card, and adhered it to the inside panel. To adhere the other side, I removed the covers to expose the adhesive on the LEFT side leaf, and then I CLOSED THE CARD on top of the leaves instead of simply sticking the leaf to the left side of the card. This insures that the leaves and card will open simultaneously when you open the card.


See? SO SIMPLE! (Okay, maybe not so simple - but it's honestly not hard to learn once you've completed one card) While my simple write-up is possibly confusing and missing some potentially helpful pictures, I hope it was helpful! I'd much rather teach it to you in person - so come check out a workshop sometime! :)

Friday, September 25, 2015

Happy National Coffee Day!

Today is National Coffee Day - clearly, one to celebrate! It's also a great excuse to make coffee-themed cards!
I've been inspired recently by Starbucks' images they're using to promote their Fall drinks. I love the use of white space surrounded by fall-themed items, and thought they would translate well to a single layer card - which works perfectly with the current Lawnscaping Challenge: One Layer Cards (http://lawnscaping.blogspot.com/2015/09/hi-there-welcome-back-to-another.html).

For these cards, I decided on one image I wanted in the forefront, then gradually added other images using a masking technique. For instance, in the card below, I first stamped the coffee bean, then heat set the image briefly to help the ink dry. I then stamped the coffee bean on a post-it note and cut it out (i.e.- created the mask), then stuck the mask over the coffee bean stamped on the card. Then, I stamped the coffee mug next, so that it partly overlapped the mask of the coffee bean. The effect of this is the opposite, as it makes it look like the mug is BEHIND the coffee bean after you remove the mask (but don't remove it just yet!). I then heat-set the mug image, created another mask of the mug stamp and stuck it on top of the card, being careful to keep the coffee bean mask on the page, and then stamped the next image so it overlapped the mug. 
I continued this process until I'd stamped all my images, and then carefully removed the masks. The end result is a single-layer card that has a lot of dimension without extra layers! Here are a few more Autumn-themed single-layer cards.

"So what's with all of the random falling leaves?" So glad you asked! Unfortunately, I wasn't super careful with my stamp blocks, so when I was stamping some of the images I ended up adding a small bit of ink where I didn't want it. My solution? Just add a leaf on top! This covered the mistake, and then I added a handful additional leaves to make it look more purposeful. Hooray for Happy Accidents! :)
I'vee also decided that I need to get a new black ink, as these mugs weren't as crisp as I wanted them. I think I'll snag a Memento Tuxedo Black Ink, as I see it used ALL THE TIME on the Lawn Fawn blog, and it clearly works well for others!
This last card (above) ended up being my favorite - no surprise there, with it being a Christmas-themed card! :) I can't WAIT for Starbucks' Red Cups and Holiday Beverages to return!
For the cards above, I used all Lawn Fawn stamps (of course!), pulling from the following sets: Love You a Latte, Deck the Halls, Sweater Weather, and Thank You Tags.

I'm also adding this to the Fall Coffee Lovers Blog Hop, which I just now discovered!
11997128_10207927414131352_1537800349_n